Going in, we were thinking that it would take the whole weekend: and we were certainly right.
Day 1 began after work on Friday. Monica and I cleared the room - took up the carpet - and discovered two alarming things.
1. The carpet pad was glued to the floor. This was huge. It meant that instead of just taking out some staples or something like that - we were left scraping gluey carpet pad off of cement. This may not sound too bad... and in several places: it really was fine. In other places though, it was terrible. We were never able to get it ALL off and after 6 hours had it "good enough" to allow the laminate to lay "pretty darn flat" over the top of it.
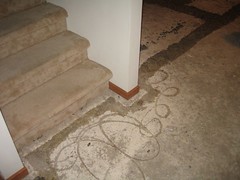
The stuff around the outside is the glued pad on the floor
2. There was a sewer access point under our carpet. This sucker stood up a good inch+ over the floor and was NOT going to make laying a laminate floor over the top very simple. There was definitely going to have to be some fancy stepping to make this work.
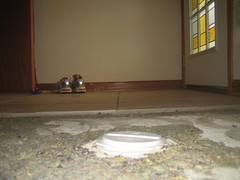
Not good
Day 2 began with my parents coming over to start helping out. Actually, that's only partly true: Day 2 actually started with my Dad playing a 3 set tennis match in the 95 degree heat!
Anyway, it was decided that the PVC pipe in the middle of the room wasn't going to work - we removed the cap - stuffed a rag down there (to stop any odors, although it didn't smell) and started filing/cutting/wishing that thing down to as level with the floor as possible. After some serious work on the thing - it was down to a very acceptable level. Actually, in the end it was the builders cement work around the pipe that was more trouble than the pipe itself.
My parents brought over some serious firepower - and we used a lot of it. Saws used included: jig, hand, skill, miter, and who could forget my Dad's favorite: table. You should have seen the display my Dad put on with that table saw - making some cuts that I would never try for fear of messing up the board - and then many others that I wouldn't make for fear of losing some fingers. He's quite the pro with that thing at one point showing off by twirling a hoolahoop on one foot while making cuts. Ok, maybe not that far: but it was quite the display.
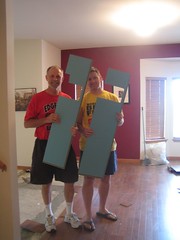
The process of putting in each flight ends up being quite labor intensive. That is - you have to attach all of the boards in your flight end-to-end. After that is completed, you hook the entire flight into the one before it. The trick there is that you can't put in half a flight at once... so, we basically NEEDED to have at least 4 people to get the thing in.
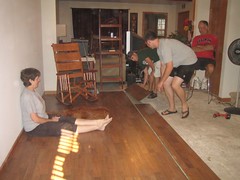
Day 3 began with the majority of the room finished but the toughest cuts right ahead of us. Following another incredible display on the table saw - we had our boards ready to fit around the stairs.
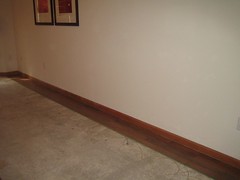
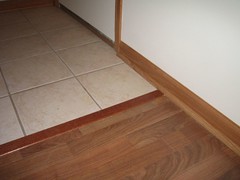
After those were in we boarded up the top of our PVC pipe (not even worth a picture it was so easy at that point!) and were on to the trim. The trim did get interesting as we found out the channel between the floor and the ceramic tile was too interesting. Here Dad took his table saw display over to the skill saw and widened it out just right.
We are SO happy with the end result. It all looks great and best of all: it's done! You'll all have to come check it out in person soon!
More pics here

3 comments:
Looks great. Make sure to tell Rusty to wear socks!
I'm knitting Rusty a pair of socks as we speak. But not for the floor. It's will be fine. The socks are pink with daisies on them and they are to drive Jimmer crazy.
the floor looks absolutely BEAUTIFUL!!!!
Post a Comment